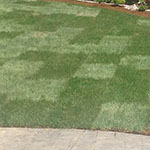
 Start by making sure the ground has been prepared well including rototilling the soil, raking the area smooth and then compacting the soil with a half filled water filled roller. Water the soil to help settle it and then repeat the smoothing and rolling. Your grade should be ¾” below any adjacent concrete.
Have your sod delivered in the morning of installation day from your local sod farm.
- Water the area to be sodded the day before so that it is moist to a depth of about 6 inches.
- Apply 16-16-16 fertilizer (1 pound per 100 sf) on top of your rolled finished grade.
- Apply lime at 5-8 pounds per 100 sf.
- Install your sod beginning against the longest straight edge and work toward any irregular boundary.
- Try not to use small pieces of sod, they won’t take root as well as larger ones.
- Fit the pieces together snugly. Stagger pieces so the sod seams don’t line up.
- When working around trees or garden areas, use a very sharp knife to cut the sod into shape.
- As you install the sod, keep the ground and sod moist with light periodic watering.
- Roll the sod with a half full water filled roller to flatten all seams and better help the sod to take root.
- Water your new lawn regularly to keep from drying out.
- It should be ready for its first mowing in 7-10 days.

